博客主题切换为Chirpy
博客主题切换为 jekyll-theme-chirpy
博客主题切换为 jekyll-theme-chirpy。
1. 背景
自己的博客之前也调整过:GitHub Pages及jekyll搭建博客,原有框架的翻页和搜索感觉不大好用,前端不大懂(后续考虑折腾一下),换一个现有的模板。
- 主题:jekyll-theme-chirpy,里面有几篇示例文章介绍了效果和写博客的语法。
- 博客主页示例:cotes page
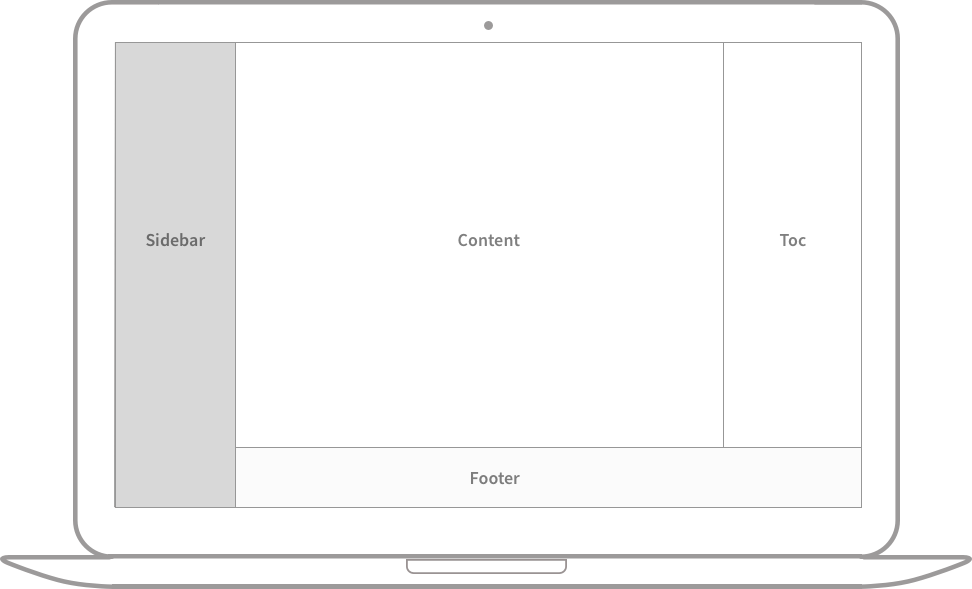
功能很丰富,查看效果:text-and-typography
下面简单记录过程。
2. 简要步骤说明
走了些弯路折腾了很久:之前直接clone原仓库,拷贝post的文章过去简单修改,一直生成不了博客主页。
说明下比较简便的路径:
- 1、通过 Getting Started里的
Option 1. Using the Starter方式,通过作者单独的一个模板仓库来创建。- 里面只保留了必要配置,不像原仓库里有很多html、css、scss等实现,没有那么多理解成本
- 2、图标头像生成,可用:icon-batch、realfavicongenerator
- 3、原有的博文移动到
_posts里,里面的头和缩进规则等需要按要求调整适配- 参考 Writing a New Post 里的要求
- 4、增加各种功能
- 可以参考网上其他人的经验
3. 新老博客兼容
3.1. 博客头部结构修改
1、博客头部结构
有差异,若有多个标签,需要修改为 [tag1, tag2] 方式;
分类最多 2 个 层,如果分层则用[]
1)原来的
1
2
3
4
5
6
7
8
9
10
11
12
13
14
15
16
---
layout: _posts
title: CPU及内存调度(三) -- 内存问题定位工具和实验
categories: CPU及内存调度
tags: 内存
---

* content
{:toc}

介绍内存问题定位工具并进行相关实验:Valgrind Massif、AddressSanitizer、Memory Leak and Growth火焰图 和 bcc中内存相关的工具。


## 1. 背景
...
2)新结构,默认的layout就为post,不用显式指定layout。
- 可以指定
date,显示博文的创建日期和创建时间,不指定则会取文件名的日期,时间则默认0点。- 会自动显示博文的
修改日期,可设置:last_modified_at限定修改时间
- 会自动显示博文的
- categories和tag,可以用
[]包裹,也可不用,不用时表示一个成员- categories里表示层级目录,最多2级。比如:
categories: [后端, 分布式],则会到后端/分布式分类里,可能有其他分类,如后端/数据库 - 标签则可用
[]指定多个,每个里面可以有空格。虽然建议小写但中文和部分术语还是无法统一小写,不全小写也不影响
- categories里表示层级目录,最多2级。比如:
1
2
3
4
5
6
7
8
9
10
11
---
title: TITLE
date: YYYY-MM-DD HH:MM:SS +/-TTTT
categories: [TOP_CATEGORIE, SUB_CATEGORIE]
tags: [TAG1, TAG2]     # TAG names should always be lowercase
---

简短描述xxx

## 章节1
...
示例:
1
2
3
4
5
6
7
8
9
10
---
title:      "xxxxxx"
date:       2024-06-05
# 归类在:xxx1/xxx2,不分层则可 categories: xxx1
categories: [xxx1,xxx2]
tag: [xxx1,xxx2,xxx3]
math: true
description: xxxxxxx
comments: true
---
3.2. 个性化修改:博客名称兼容
之前的博客里面,有的贴了历史文章的链接,新生成的博客链接通过permalink修改规则,保持兼容
1
2
3
4
5
6
7
8
9
10
11
12
13
14
defaults:
  - scope:
      path: "" # An empty string here means all files in the project
      type: posts
    values:
      layout: post
      comments: true # Enable comments in posts.
      toc: true # Display TOC column in posts.
      # DO NOT modify the following parameter unless you are confident enough
      # to update the code of all other post links in this project.
      # 博客链接格式:https://xiaodongq.github.io/posts/memory-management/
      # permalink: /posts/:title/
      # 修改类型为:https://xiaodongq.github.io/2025/03/20/memory-management/
      permalink: /:year/:month/:day/:title/
3.3. git 提交要求
github workflow里会检查提交log的规范性:
- uses: wagoid/commitlint-github-action@v6
feat, fix, docs, style, refactor, test, chore
1
2
feat: note
xxx
4. 新增效果体验
体验了一下新增的效果,记录下语法。具体见:text-and-typography
4.1. 显示提示效果
引用后面加:{: .prompt-tip }、{: .prompt-info }、{: .prompt-warning }、{: .prompt-danger }
1
2
> The posts' _layout_ has been set to `post` by default, so there is no need to add the variable _layout_ in the Front Matter block.
{: .prompt-tip }
1
2
3
4
5
6
7
8
9
10
11
> An example showing the `tip` type prompt.
{: .prompt-tip }

> An example showing the `info` type prompt.
{: .prompt-info }

> An example showing the `warning` type prompt.
{: .prompt-warning }

> An example showing the `danger` type prompt.
{: .prompt-danger }
4.2. 设置图片宽度和高度
{: width="700" height="400" },也可缩写w=、h=
4.3. 图片位置
默认情况下,图片居中,可以使用 normal、left 和 right 类之中的一个指定位置
正常位置:{: .normal }
向左对齐:{: .left }
向左浮动:可以实现图在左侧,右侧是文字的效果:
{: width="972" height="589" .w-50 .left}
向右浮动:可以实现图在右侧,左侧是文字的效果:
{: width="972" height="589" .w-50 .right}
指定位置后,不应添加图片标题。
4.4. 深色/浅色模式、阴影
light/dark指定深浅,在切换主题时,图片也会有不同效果
{: .light }

4.5. 置顶帖子
可以将一个或多个帖子置顶到首页,置顶的帖子会根据其发布日期以相反的顺序排序
1
2
3
---
pin: true
---
4.6. 隐藏代码块行号
可以隐藏行号:.nolineno
1
echo 'No more line numbers!'
4.7. 脚注
footnote[^footnote]形式:
1
Click the hook will locate the footnote[^footnote], and here is another footnote[^fn-nth-2].
在文章最后:
1
2
[^footnote]: The footnote source
[^fn-nth-2]: The 2nd footnote source
4.8. 链接
除了 []() 形式,还可以:
<http://127.0.0.1:4000>
4.9. 列表
主要是其中的待办列表,可以展示勾选框:
1
2
3
4
5
6
7
8
9
10
11
12
13
14
15
16
17
18
### Ordered list

1. Firstly
2. Secondly
3. Thirdly

### Unordered list

- Chapter
  - Section
    - Paragraph

### ToDo list

- [ ] Job
  - [x] Step 1
  - [x] Step 2
  - [ ] Step 3
4.10. 描述列表
会避免展示成 * xxx 里面的缩进形式
1
2
3
4
5
Sun
: the star around which the earth orbits

Moon
: the natural satellite of the earth, visible by reflected light from the sun
5. 安装功能模块
5.1. 安装Giscus 评论系统
配置到 _config.yml 的 giscus
5.2. cdn加速
jsDeliver (感觉更新博客后很久看不到效果,cdn缓存体验了下,暂时注释关闭了)
5.3. 网站数据统计
1、page view和分析,使用:goatcounter
2、另外在底部增加 不蒜子
参考:6. 增加站点统计
5.4. markdown解析器说明:kramdown
kramdown 是一个用 Ruby 实现的 Markdown 的解析器,Jekyll默认就是使用kramdown。
支持的语法:kramdown Syntax,支持内容比较丰富,比如数学公式、脚注(footnote[^footnote],[^footnote]: xxx)。
5.5. 目录不折叠
目录不折叠参考:jekyll-theme-chirpy.scss
从原博客拷贝一个 assets/css/jekyll-theme-chirpy.scss,增加:
1
2
3
4
// 让目录不产生折叠效果
.is-collapsed {
  max-height: none !important;
}
5.6. 优化文本搜索
当前搜索结果比较模糊,效果不大好。调整为支持精准搜索。从参考文章的博客拷贝使用,由于lib是个子模块,新增一个assets/lib2。
相关文件从默认主题复制新增后,对比参考链接修改:
参考:优化文本搜索
5.7. 增加4个新的prompt
引用时可以显示颜色:
原有4个类型如下,上面 显示提示效果 已经介绍过了。
使用时,手动设置属性:
1
2
3
4
5
6
7
8
9
10
11
12
13
14
15
16
17
18
19
20
21
22
<!-- 包含标题 -->
<div class="box-warning" markdown="1">
<div class="title"> Shakespeare </div>
To be or not to be. That is a question.
</div>

<!-- 不包含标题 -->
<div class="box-info" markdown="1">
To be or not to be. That is a question.
</div>

<div class="box-tip" markdown="1">
To be or not to be. That is a question.
</div>

<div class="box-warning" markdown="1">
To be or not to be. That is a question.
</div>

<div class="box-danger" markdown="1">
To be or not to be. That is a question.
</div>
5.8. 博客个性化参考链接
1、官网demo推荐的个性化方式:从原博客拷贝一个 assets/css/jekyll-theme-chirpy.scss (Customizing the Stylesheet
Customizing the Stylesheet
To customize the stylesheet, copy the theme’s assets/css/jekyll-theme-chirpy.scss file to the same path in your Jekyll site, and add your custom styles at the end of the file.
其他的内容也是拷贝到相应位置。
2、后续按需修改,可参考别人个性化修改的经验:
- 目录不折叠就是在这里看的:jekyll-theme-chirpy.scss
- 从 chirpy博客改造指北(个人向) 里面找到上面的博客链接
6. GitHub Profile
通过GitHub Profile功能,可通过README.md来自定义Github首页。可以在GitHub主页展示commit、PR等统计信息和一些动画效果,挺有意思,可参考:如何打造一个花里胡哨的Github个人主页?。
GitHub提供的Profile操作文档:管理个人资料自述文件
步骤:
- 1、创建一个和用户名同名的仓库,需要是
public,需要包含README.md - 2、为内容添加自己需要的模块
- 可以参考一些模板,如:
- commit统计:github-readme-stats
- 只要简单的一句放到README.md里面
- 支持的参数说明可见:readme.md
- 贪吃蛇:snk
- 使用
Actions,可参考给GitHub首页添加一个有趣的贪吃蛇小动画- 生成的图片会提交到单独的branch,不影响GitHub正常的提交记录。
- 这个贪吃蛇叠加小游戏,更有意思一点:把 GitHub 变成游戏厅!(吃豆人 + 贪吃蛇 + 炫酷奖杯!)
- 使用
- commit统计:github-readme-stats
- 可以参考一些模板,如:
1
2
3
4
5
6
7
8
9
10
PR统计
[](https://github.com/anuraghazra/github-readme-stats)
使用语言统计
[](https://github.com/anuraghazra/github-readme-stats)
排版到同一排
| <img align="center" src="https://github-readme-stats.vercel.app/api?username=xiaodongQ&show_icons=true&include_all_commits=true&hide_border=true" alt="GitHub stats" /> | <img align="center" src="https://github-readme-stats.vercel.app/api/top-langs/?username=xiaodongQ&layout=compact&hide_border=true&langs_count=10&size_weight=0.5&count_weight=0.5&hide=assembly,BitBake,yacc,M4,SmPL,Roff,Objective-C,makefile,cmake,perl" /> |
| ----------------------------------------------------------------------------------------------------------------------------------------------------------------------- | ------------------------------------------------------------------------------------------------------------------------------------------------------------------------------------------------------------------------------------------------------------- |